I'm going to start with some honesty.
I injure/ruin my smart phone about once a year (ie toilet plunges, cheese in the charge port, spilled water...) and my deadline is coming up.
This post is mostly to get all of my stained-glass cake photos in one place so that when the fatal day occurs, I won't lose them all.
Don't worry, I'll include the tutorial links and a link to a FABULOUS white cake recipe to make this worth your while.
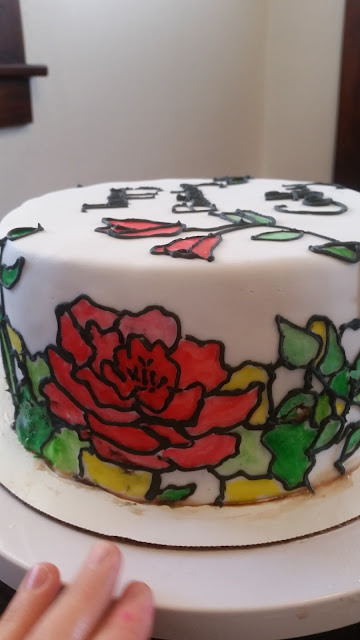
This is a stained glass-style cake that was actually pretty easy to make, but it involved a lot of steps.
This was a white cake with buttercream icing in the middle, chocolate ganache on the outside, and white fondant on the top.
I'm kinda hoping to try this on a wedding cake someday.
Here's the tutorial that guided me through the stained glass detailing. (Note: the tutorial uses alcohol/food dye to paint the flowers, I substituted clear vanilla extract for the alcohol).
I got the idea for a chocolate ganache coating online. The purpose is to get your cake to have super-sharp edges, but I learned that this technique may take a few tries. But even if it doesn't quite work, who doesn't love an extra layer of chocolate in their cake?
Fondant beginners ought to check out some tutorials before working with fondant; it can be difficult but a few little tricks make things much easier.
You can see that I've got a brown line around the bottom of the cake-- I used too much corn syrup on top of the chocolate layer. Corn syrup makes the fondant stick to your cake, but I learned that you just want enough to make the cake tacky, not enough that syrup leaks out the edges of your cake!
Finally, I've found a really excellent white cake recipe. It's a good cake as is, but add 2/3 cup sour cream to the butter mixture if you want a moist cake. Without the sour cream, the cake is a little too dry.
*Sorry about the wind in the video. I needed to go outside to film this since my little girls were being happy and noisy.
 |
| Painting the fondant makes it easy to cover mistakes :) |
Add color...
It's important to leave some white space when painting-- it looks much more natural.
And that's it!
-Jenna


No comments:
Post a Comment